Expedient Field Repair - U Joints
|
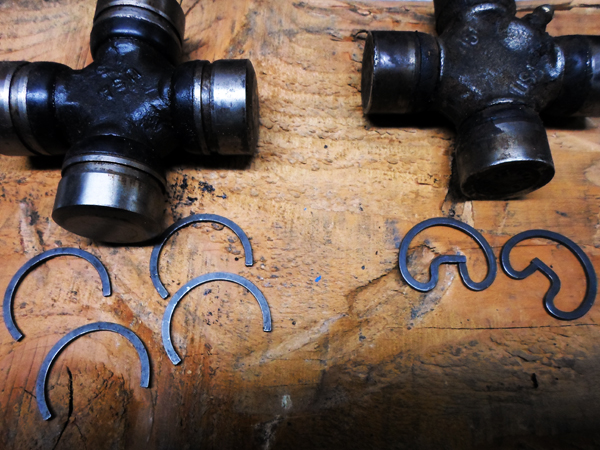 There are two styles of clips that retain the caps on a u joint. The clips on the out side of the cap are typical of drive shaft u joints.
The "C" Clips that fit behind the cap is typical of an axle shaft.
(click picture for higher resolution)
|
Breakdowns and broken parts are about as common as dirt in your face and wind in your hair.
In fact, considering the abuse a vehicle often takes, it’s a wonder that the breakdowns aren’t more severe.
In an earlier column
I discuss ways to minimize hazards and therefore potential damage to your vehicle.
Here I’ll show you how to replace a universal joint. U-joint replacement, while not as common as fixing tires or replacing tie rods, is an important skill to know.
A broken U joint will cripple your vehicle; knowing how to handle the situation will get you back on the trail.
There are a variety of U-joints in both the front axle and drive shafts.
The front drive shaft U-joints are different from the back drive shaft, and the U-joints at each end of the drive shaft could be different from each other.
Take a moment to review the U-joints found in your vehicle(s). Pack spare U-joints that are appropriate for your front axles and drive shafts.
They are cheap insurance and take up little space.
If you have a spare U-joint and that’s the only thing that’s broken, swap in a good one.
If the universal joint damaged the yoke it fits into, take the damaged part out so you can still drive (or tow) the vehicle.
One of the cardinal rules of four wheeling is to be prepared. Remember this: The more remote and the more difficult the trip, the more you need to take!
That is when you take a spare drive shaft or axle(s) too.
By the way, I occasionally offer a one-day field repair class. I discuss U joint replacement and other topics. Contact me if you’re interested in learning more.
Replacing a universal joint
The tools and parts you’ll need for replacing a U-joint include:
- New U-joint
- Snap ring pliers or pliers
- Flat blade screw driver to push the "C" clips off - a thin blade is nice
- Big hammer
- Block of wood to work on
- Old socket that has the right OD (outside diameter) to fit inside the yoke holding the U-joint cap
How to change a u-joint:
(Follow the pictures below.)
- Remove the axle or drive shaft so you can get to the U joint (seems we might need to cover that in another article).
- Remove the snap rings on both ends (some have a C clip on the inside – push them off with a screw driver).
- Use an old socket (spark plug socket is about right) to drive the cap in on one side forcing the cap out the other side. This will destroy the socket, which is why I recommend you use an old one.
- Remove the cap that comes out the far side of the yoke.
- If you can, work the other cap off on the inside of the journal. If not, drive it back out its original side.
- When you put the new caps on make sure all the needle bearings are in place and that none have fallen out.
If one is lying in the bottom of the cap, you will not be able to get the snap ring back in and will have to start over.
Set the other caps aside so they are not damaged or fall off as you hammer the one you are working on.
|
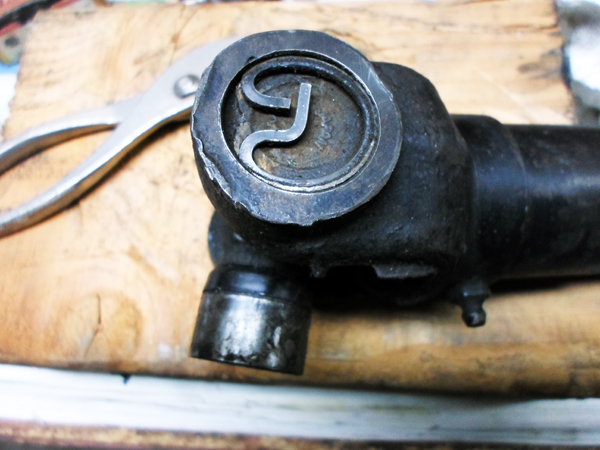 This is what a drive shaft u joint looks like. Only 2 of the caps have retention clips. The other two ends have u bolts or straps that hold them to the
output shaft of the T-case or the pinion of the axle. If you need to save this u joint - tape the other two caps to each other so they can not fall off.
(click picture for higher resolution)
|
|
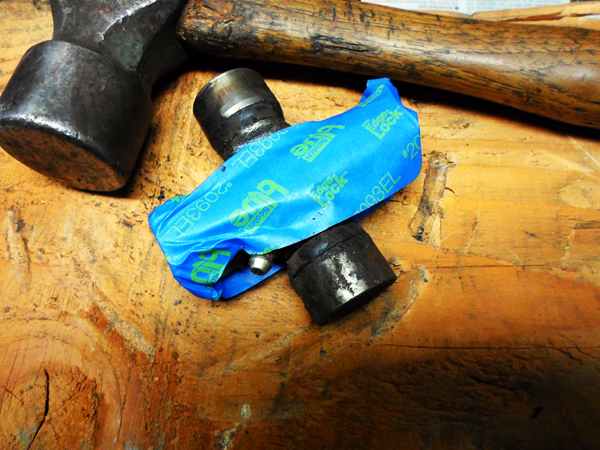 When you unbolt the u joint from the drive shaft, run a bit of tape - like this - to ensure the two caps not in the yoke
do not fall off and spill their needle bearings. In this picture, we have already removed the other two caps from the yoke.
(click picture for higher resolution)
|
|
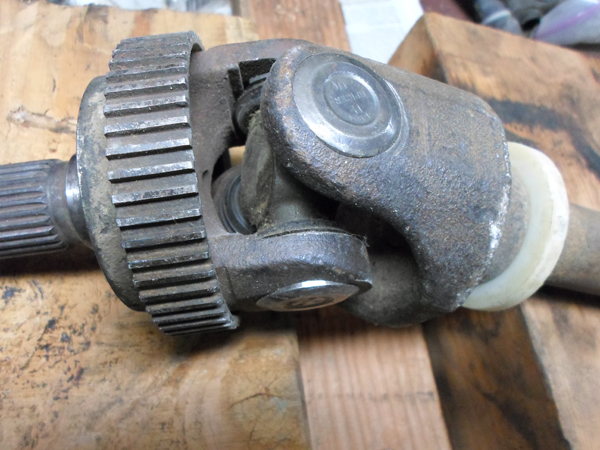 This is what a front axle u joint looks like. Look carefully and you can see the "C" clips clearly on at least one of the caps.
(click picture for higher resolution)
|
|
|
|
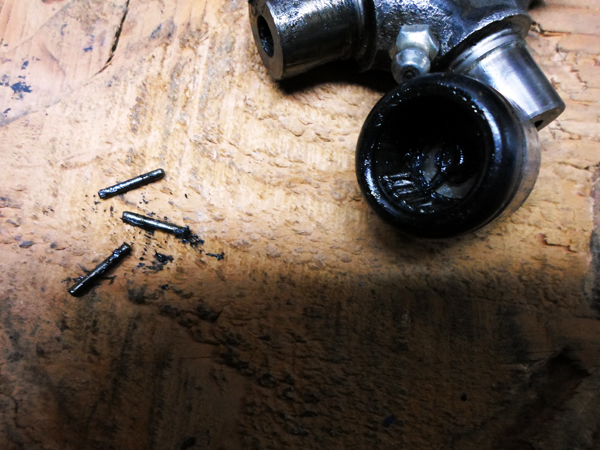 You don't want to see needle bearings falling out of a cap you need to use / reuse. Our friend "Pappy" meticulously found every one in the dirt one day and
put them back in place. There was no other option - we did not have a second spare u joint.
(click picture for higher resolution)
|
|
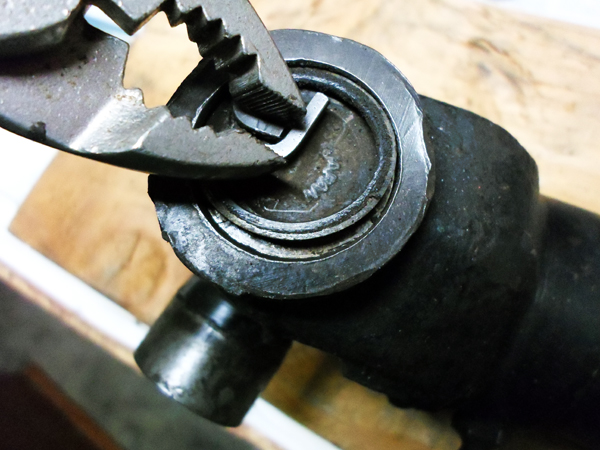 Use pliers to remove the snap ring in this type u joint or use a screw driver to remove the c clips on the other type u joint. Normally you will find
fresh snap rings or c clips in the box with the new u joint. However, keep track of the old ones. With limited resources, you may just find you need it
if one goes flying off never to be found!
(click picture for higher resolution)
|
|
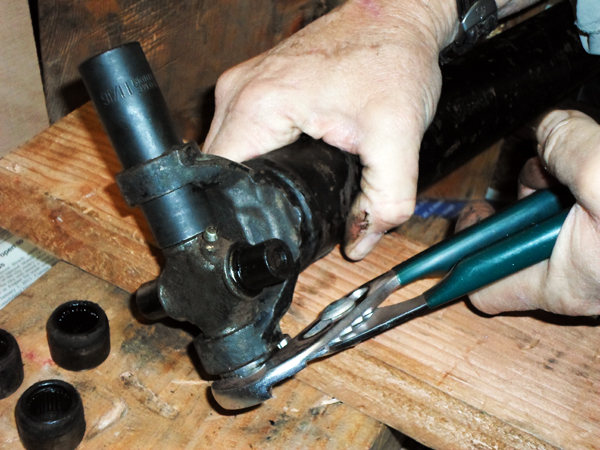 Use an old socket (spark plug socket is about right - this one is a bit bigger at 11/16) to drive the cap in on one side forcing the cap out the other side.
This will damage the socket, which is why I recommend you use an old one.
Remove the cap that comes out the far side of the yoke.
If you can, work the other cap off on the inside of the journal. If not (which is common for me), drive it back out its original side. We are at that stage of driving the cap out
the other side in this picture. Use a pliers, if necessary, to grab the cap at this stage and pull it out.
(click picture for higher resolution)
|
|
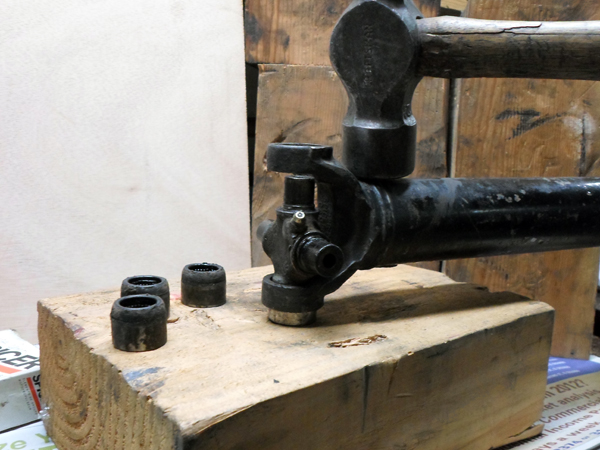 Set all the other new caps to the side to avoid spilling the needle bearings. Start the first cap from the bottom so you can keep it up right and not
drop the needle bearings. Carefully insert the journal into the cap to ensure none of the needle bearings fall down into the bottom of the cap. Use
a large hammer on the weld ring of the drive shaft to seat the cap. If even one needle bearing falls down into the bottom of the cap, it will prevent
you from having enough clearance to seat the snap rings into thier grove. If that happens (it has to just about everyone) you need to start over by driving
out the caps again. Think of it as good practice!
(click picture for higher resolution)
|
|
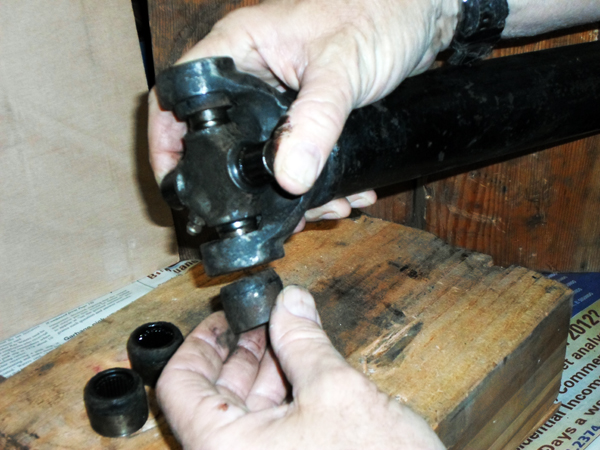 Hold the journal so it stays in the first cap and turn the yoke over.
Start the second cap from the bottom. Carefully lower the journal into it.
(click picture for higher resolution)
|
|
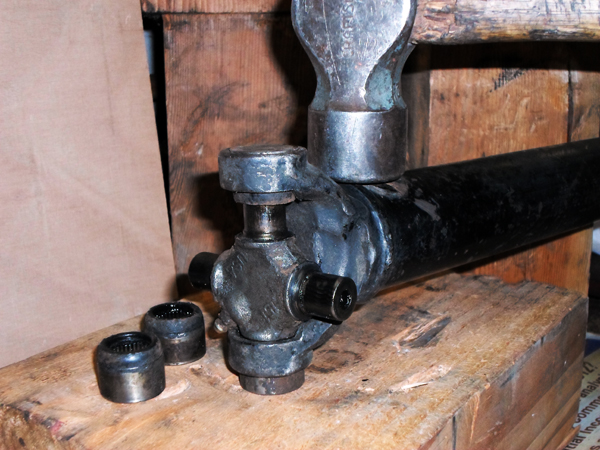 Use the hammer again to seat the second cap. Use the socket to tap them down until you can replace the snap rings on both ends. Make sure the snap rings fit fully into their grove.
(click picture for higher resolution)
|
|
Spend a few moments to make sure your vehicle is stocked with the appropriate tools and replacement parts. Those, along with the knowledge outlined here, will help you if you ever need to replace a universal joint.
# # #
# # # #
|
|
Related Articles from Badlands Off-road Adventures
|
Did you miss the previous articles?
|
March / April Schedule
(click on the link for details)
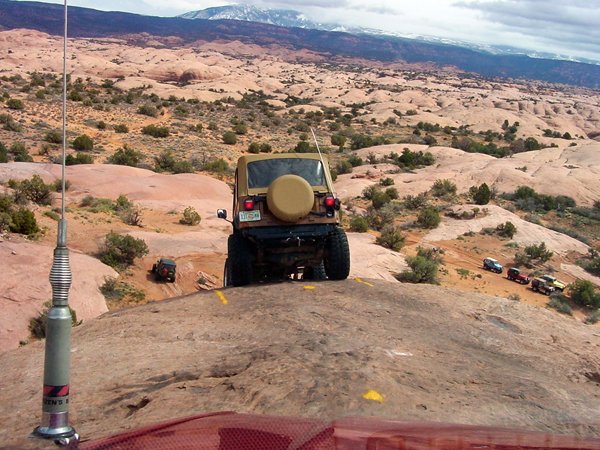
Click for higher resolution image
|
- March 03 Basic to Advanced Winching Clinic - Borrego Springs, CA
- March 09 Getting Started Off-Road Driving - LA area
- March 10 Advanced Beginner Clinic - Mojave CA
- March 16 Getting Started Off-Road Driving - San Diego area
- March 17 Rock Driving Clinic - last chance before Easter Safari
- March 25 Easter Safari
- April 06 Getting Started Off-Road Driving - LA area
- April 07 Tire Repair & Hi-Lift Mini Clinic
- April 27 Getting Started Off-Road Driving - San Diego area
- April 28 Advanced Beginner Clinic - San Diego Area CA
|
##########################
Wilderness Advanced First Aid Course June 7, 8, 9 & 10, 2013
Mark these dates on your calendar or sign up now so you don't forget.
The Wilderness Advanced First Aid clinic will provide you with skills, knowledge and training to handle life threatening medical emergencies
and allows you to be better prepared to protect your family in an emergency.
Wilderness Advanced First Aid is a four day immersion into general medical concepts and Basic Life Support skills.
This course teaches what to do with a medical emergency when help is miles away and calling 911 isn’t an option.
If you plan to become a Wilderness First Responder, this is the first 4 days of the 8 day Wilderness First Response course.
You can take the second 4 days at a later time (within 3 years).
"
The Wilderness First Aid was one of the MOST USEFULL clinics I have ever attended, due in large part to the effort you and Josh put in to make it all possible.
"
Joe de Kehoe
Note - this is a four day class and you must be at least 18 years old.
If you are interested follow these links.
More Details...
You can register directly at
http://www.4x4training.com/calendar/calendar.php#WFA
|
Winch Recovery Bandana
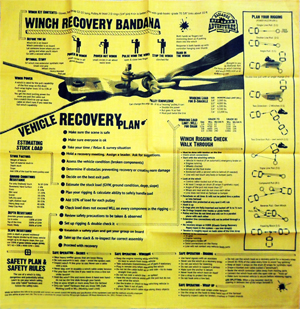
Click for higher resolution image
|
The Bandana is packed full of useful information and is a quick reference in the field when no DVD player is available."
The Bandana layout follows the “Vehicle Recovery Plan” with pathways to more detail.
A unique section of the Bandana, gives the steps for a “Winch Rigging Check: Walk through” so that you verify every element of the rigging before you commit to the pull.
Stuff this in your recovery kit and you will always be ready!
Pick up or order the Winching DVD too!
There is no substitute for hands on training. If you can, sign up for one of Badlands Off-Road Adventure’s Winching Clinics.
Warning – the Bandana and DVD are not a substitute for proper training and use of quality equipment that is used within the bounds of their safe working load.
We advise you to use the information provided in both the Winching Recovery Bandana and the "Basic to Advanced Winching and Recovery DVD" at your own risk.
We cannot control the quality and specifications of the equipment used and the methods actually employed.
Winch Recovery Bandana Order Button
|
I hope to see you on the trails!
Tom Severin, President
Badlands Off Road Adventures, Inc.
4-Wheel Drive School
310-374-8047
http://www.4x4training.com
Make it Fun. Keep it Safe.
#####
If you find this information valuable, please pass it on to a friend. You can forward them the email.
If you received a forwarded copy of this newsletter and would like to subscribe for yourself, go to:
www.4x4training.com/contacts.html
and follow the instructions to join our mail list.
Want To Use This Article In Your Magazine, E-Zine, Club Newsletter Or Web Site?
You are welcome to use it anytime, just be sure to include the following author/copyright information:
Tom Severin, 4x4 Coach, teaches 4WD owners how to confidently and safely use their vehicles to the fullest extent in difficult
terrain and adverse driving conditions.
Visit www.4x4training.com to develop or improve your driving skill.
Copyright 2013, Badlands Off-Road Adventures, Inc.
|
|